
Thanks Mom!
It's funny how your mind plays memory tricks on you though. I could have sworn her rolls were made of biscuit dough, but apparently not. That just might explain why mine never turn out like hers... Ya think?
Cinnamon Buns
One of the things I enjoyed doing in the 1970's was, making homemade yeast cinnamon buns.
In order to bake something that took hours to make, involved a strategy on my part.
1. There would have to be enough uninterrupted hours
2. The laundry would have to be caught up
3. The antique kitchen hutch would have to be ready for bread making.
Editorial Note: Here's a picture of a hutch that looks a lot like the one we had:
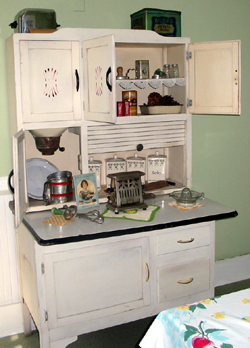
I used to sit at the hutch with an old mechanical adding machine and pretend I was a secratary. Très glamorous!

I’m sure this list will seem strange (to the average baker) but, alas, as a working mother & wife (who also worked Saturday mornings). This is how I figured that... Sunday was The Day.
I think any yeast bread recipe would do for cinnamon buns; I just needed to make a sweeter dough, by adding 3 tablespoons additional sugar with the other ingredients. ( I used the recipe for bread from the Betty Crocker Cookbook.)

Here’s a tip for using the yeast. One package of yeast is dissolved in ½ cup of warm water 110-115 degrees; let this wait for about five minutes before proceeding.
After all the ingredients were mixed together, it was time to manually knead the dough for 10 to 15 minutes. Then, I shaped the dough into a ball, and place in greased bowl, covered by a hot, wet, clean dish towel. I needed a nice warm spot, for the dough to rise, so I placed it on the floor next to the floor furnace. Depending on how warm the spot was, the dough would rise enough between an hour to an hour and a half.
After the dough had risen to about double in size, it was time to punch it down. Then I rolled the dough into a large rectangle, about 24 inches long and 16 inches wide. Next I buttered the dough throughly with softened butter and sprinkled a mixture of brown sugar (about 1/2 cup) and cinnamon (about 2 tablespoons,) and raisins (about one cup) over the top (this is the time to add chopped nuts, if you like, although I never used any nuts.) I then rolled up the rectangle, starting with one long side and working toward the other long side. I pinched the edge, and the ends of the rectangle to keep the filling from falling out.
Now it is time to cut this dough into the cinnamon buns. I found that a long thin bread knife, makes a nice clean cut. I made the cuts about one inch wide, placing the cut side down touching each other on a large cookie sheet. The buns are now ready to rise for another hour, so I covered them with a hot wet cloth, as before, and then down next to the furnace to rise for the last time.
When the rolls had risen for an hour, I lightly touched a roll to check to make sure it does not dent in when touched. Time to bake. 425 for 20-25 minutes.
As the buns baked, the smell in the house and outside the house was so wonderful; voices were often heard asking, "Are they done yet?"
Time to eat cinnamon buns!

